

Slow down, measure twice, and craft a kitchen workhorse that absorbs every blow.
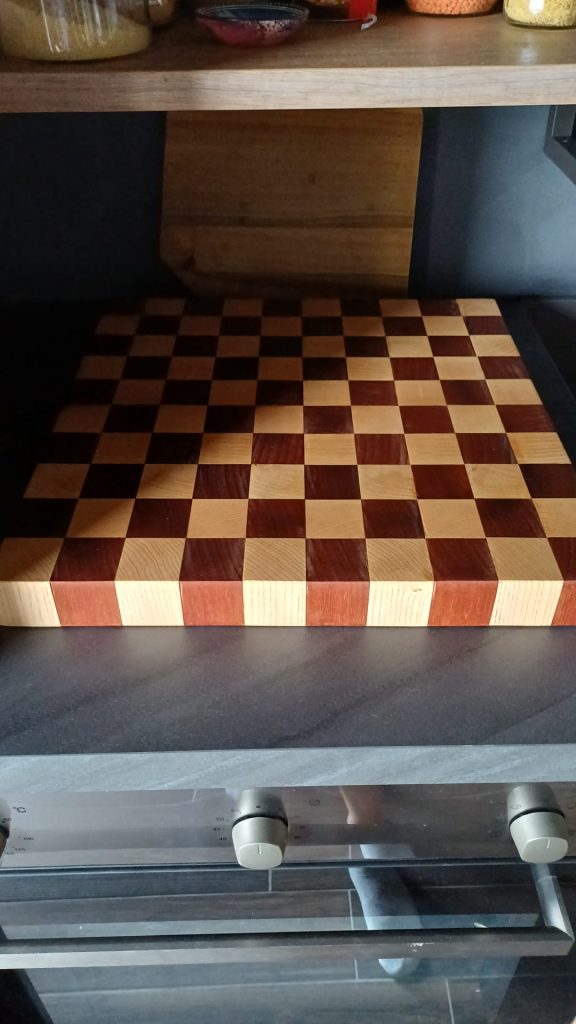
There is a specific kind of satisfaction that comes from making something both visually striking and purely functional. In hand tool woodworking, few projects offer this balance as clearly as an end grain cutting board. We aren’t aiming for delicate joinery here; we are building a rugged surface designed to absorb the impact of a sharp knife, day after day.
For this build, I chose mahogany and ash. This isn’t just an aesthetic choice based on the high contrast between the dark mahogany and the light ash. It’s a functional decision. Both are durable hardwoods, but when oriented as end grain—where the wood fibers stand vertically like bristles on a brush—they create a self-healing surface that preserves knife edges and withstands heavy kitchen use.
If you are a beginner, this project will teach you three critical lessons: absolute precision in dimensioning, the importance of a tight glue joint, and patience during the flattening stage. Rushing any of these steps will result in visible gaps, a wobbly board, or a mosaic grid that simply fails to align. We are building a geometric mosaic, and every millimeter counts.
Ingredients – Tools you’ll need
✅ Sharp bench plane (No. 4 or No. 5)
✅ Hand saw or Japanese pull saw
✅ Try square & marking gauge
✅ Heavy-duty parallel or F-clamps
✅ Waterproof food-safe wood glue (Titebond III)
✅ Card scraper
✅ Food-grade mineral oil & natural beeswax
✅ Budget alternative: Vintage hand plane restored manually + standard F-clamps
✅ Premium alternative: Low-angle jack plane + heavy parallel clamps
Step-by-Step Process
1️⃣ Dimension the Initial Wood Blanks
The success of the mosaic pattern depends entirely on this first step. You must dimension your mahogany and ash stock into identical, perfectly square blanks. Mill your lumber so that all four sides are flat and square (90 degrees) to each other. If your blanks vary in width or thickness, the checkers will drift out of alignment during final assembly. Check every face continuously with your square.
2️⃣ The First Lamination (Strip Assembly)
Arrange your squared blanks on a flat surface, alternating mahogany and ash. Apply a generous, even layer of food-safe waterproof glue to the mating faces. Clamp the assembly firmly from the sides. Ensure you get consistent squeeze-out along every joint, but do not overtighten to the point of starving the joint. Keep the panel perfectly flat against the clamp bars so it doesn’t twist.
3️⃣ Flatten the Laminated Panel
Once the glue has fully cured (allow at least 24 hours), remove the clamps. You now have a striped panel. Before making any further cuts, you must plane both large faces completely flat. Use a sharp bench plane to remove all glue squeeze-out and smooth the surfaces. This step is critical because these planed faces will become the gluing edges for the next lamination.
4️⃣ Crosscut the Panel into Uniform Strips
Now you need to slice the striped panel crosswise into segments. Using a fine-cut crosscut saw, cut the panel into uniform strips. The thickness of these cuts will determine the final thickness of your cutting board. Use a stop block to guarantee that every single strip is cut to the exact same width. Any variation here creates an uneven top surface later.
5️⃣ Orient and Alternate the Mosaic Pattern
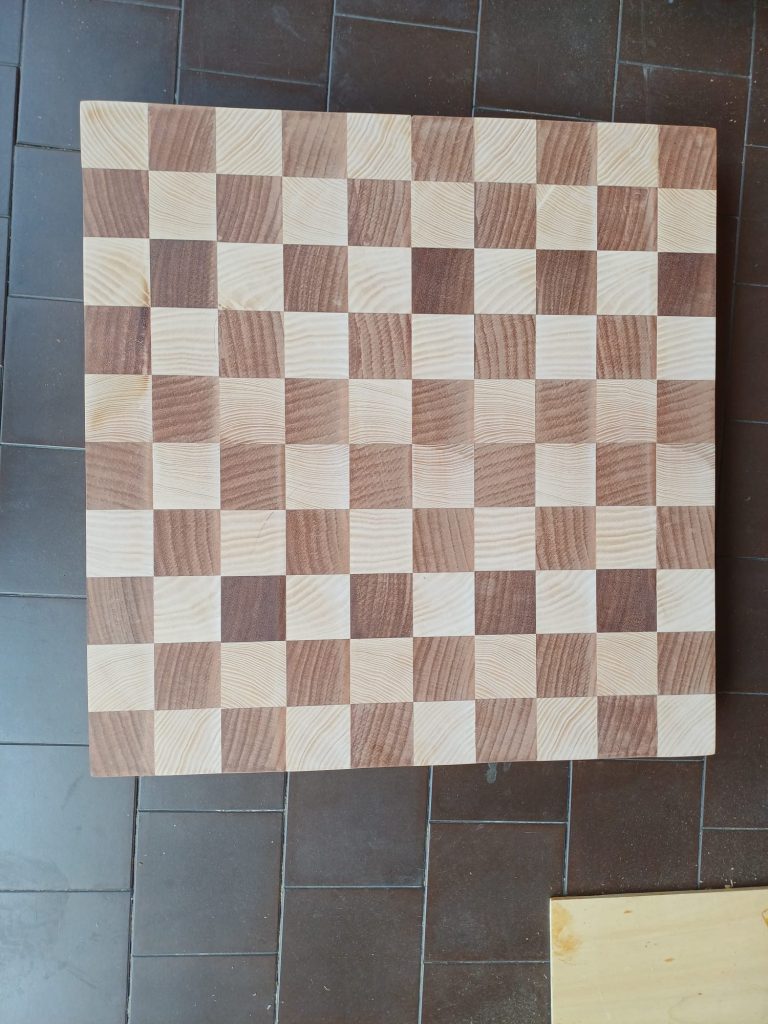
This is where the mosaic pattern appears. Take every second strip you just cut and rotate it 180 degrees. As you flip the pieces vertically to expose the end grain, the alternating dark and light squares will form a clean checkerboard grid. Dry-fit the entire assembly first. Check for gaps, misaligned corners, or uneven strips before applying any glue.
6️⃣ The Final End Grain Glue-Up
Apply waterproof wood glue generously to the cut end grain faces. Because end grain acts like a bundle of straws, it absorbs glue rapidly; do not starve these joints. Align the pattern carefully as you apply clamp pressure. Use parallel clamps across the width and length if necessary to keep the mosaic flat and square. Wipe away excess wet glue immediately.
7️⃣ Flatten and Level the End Grain Surface
After the final glue-up cures, the surface will have minor height variations between the blocks. Flattening end grain with hand tools requires technique. Use a very sharp bench plane—a low-angle plane works best—and take extremely light, diagonal passes across the board. Keep your blade razor-sharp to prevent fiber tear-out.
8️⃣ Scraping, Sanding, and Natural Oil Finish
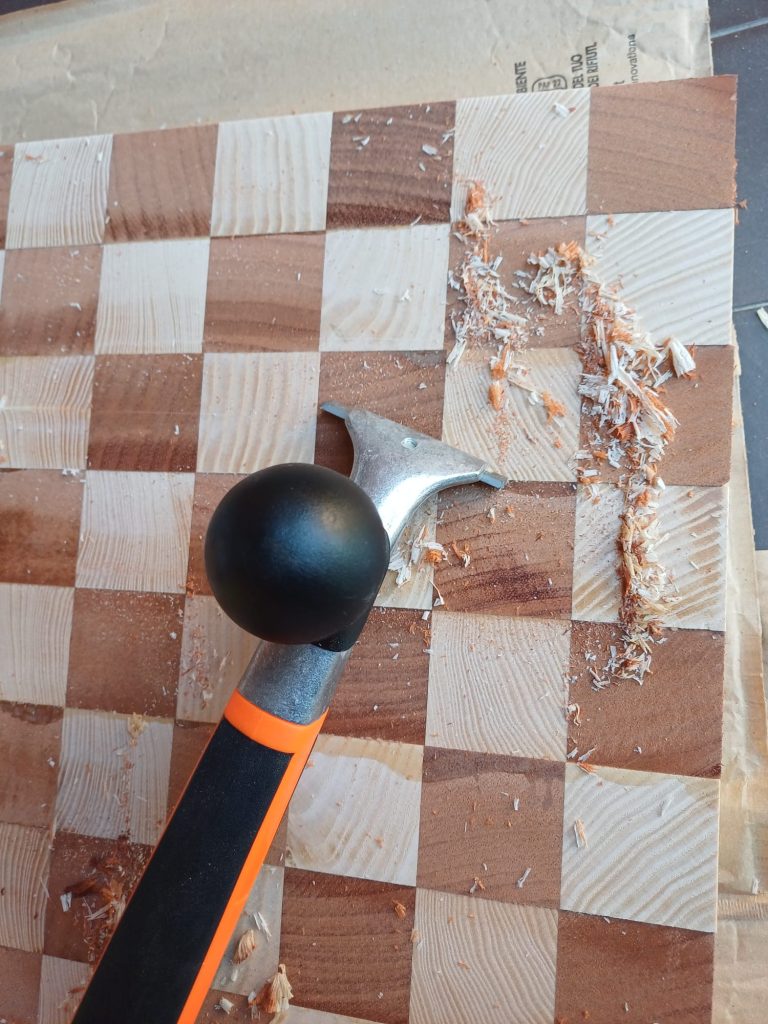
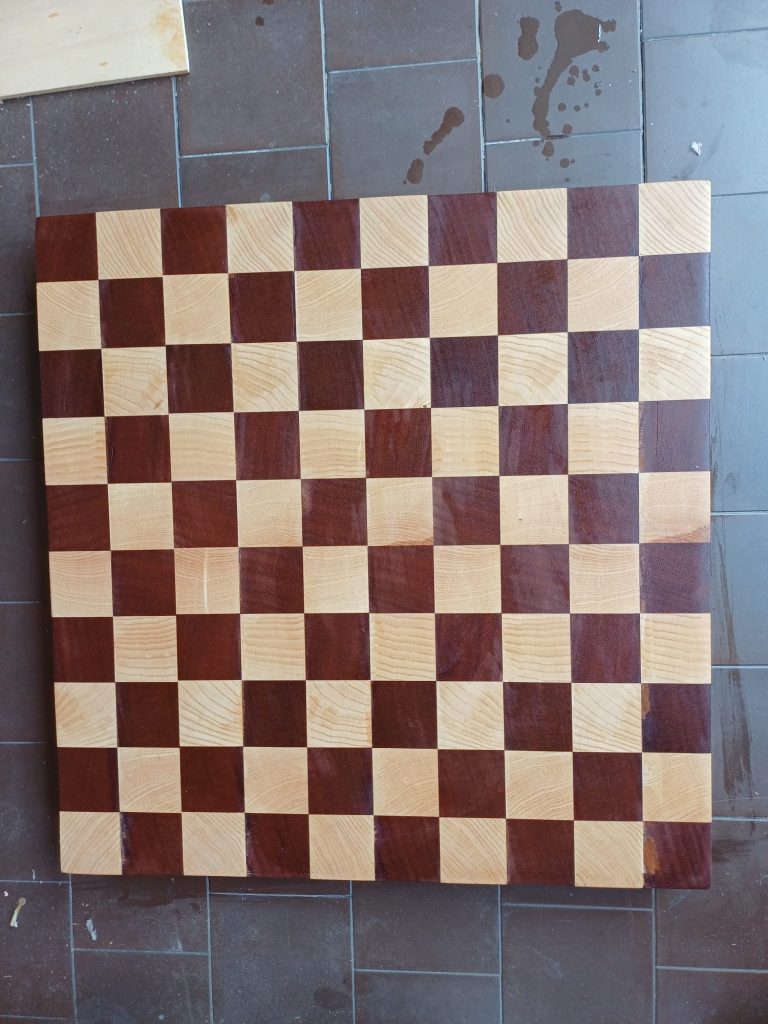
Switch to a card scraper to remove plane tracks and leave a smooth finish without clogging the end grain pores with dust. Sand lightly up to 280 grit. To finish, saturate the board with food-grade mineral oil. Because end grain is highly porous, it will soak up several coats over a few days. Seal the surface with a melted blend of mineral oil and beeswax for a durable, water-resistant sheen.
Difficulty & Cost
Difficulty: Intermediate
Estimated cost: €50–€80 (depending on lumber sourcing)
Time required: 15–20 hours (spread over several days for glue curing)
Conclusion
There is something strangely old-fashioned about working end grain by hand, because the process forces you into a slower rhythm where every joint matters, every movement of the plane requires intention, and every mistake in dimensioning becomes visible against that alternating grid of dark mahogany and pale ash.
Modern sanders could finish this surface in minutes, but they will never give you that quiet connection to the material that comes from taking a light, diagonal pass with a razor-sharp plane iron and watching a clean, smooth surface emerge from raw end grain.
Building this board is a lesson in patience: waiting for the glue to cure completely, checking squareness twice before cutting, and accepting that working dense hardwoods requires constant sharpening and careful attention.
When you finally apply that first coat of natural oil and watch the rich mahogany darken while the ash stays bright, you realize the value was never in rushing to the end, but in the deliberate steps it took to get there. How do you handle end grain flattening in your shop? Have you ever had a mosaic pattern drift out of square during the final clamp-up?
Recommended External Resources
- Youtube: The Mosaic Endgrain Cutting Board – D.E. Jaeger Woodworking (The Traveling Woodworker)
Explore More
If you liked this article, see also a related articles – Stop Buying What You Can Create: 5 Timeless Woodworking Projects for Your Weekend
Happy woodworking! 🪵✨